Last updated on December 6th, 2023
Getting Started
The best part of taking amazing photos for Instagram is that it doesn’t need any expensive equipment. In fact, you only need a basic camera. Regardless of the type of picture you want, the best camera is the one with you. Most successful Instagrammers use a high-grade Smartphone camera or a DSLR camera. Choosing between these two choices needs an understanding of their strengths and weaknesses.

Mobile phones have evolved. They’re from the era of making calls and sending messages. Now they’re multifunctional tools. They can perform the functions of many traditional tools and equipment including cameras. There will always be space for cameras in photography. One of the barest basics expected in a modern smartphone is a good camera. It rivals more conventional cameras. Top of the range of smartphones has pushed the limits of engineering. Phone cameras are now as good as a lot of cameras. The added ease and availability in using smartphones for Instagram photos is a plus side. The fact that we lug our phones around and they leave us, never having to miss a shot because our camera stays at home. (check out our Iphone X photography guide here)

You are on a walk around your local park and you see a pigeon feeding its young ones in a show of maternal love. And you feel like this is a photo-op for your Instagram. You simply whip out your Smartphone and bam!!! You have your picture. Back in the day, you may have come across a picturesque moment. You would have had to pack your camera along for the walk, and that can be rather quite inconvenient.
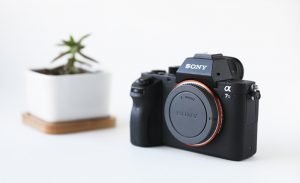
It is not a win-win for smartphones. Most smartphones can’t reach the quality and creative freedom offered by cameras. I particularly favor DSLRs over other cameras. You are most likely more familiar with compact digital cameras. Unless you are a professional photographer. But the use of DSLRs has gained ground since the turn of the millennium. DSLRs offer more speed (something smartphones also provide). They offer higher frame rates while producing the highest quality pictures with less grain. (Because of a large and very sensitive sensor and high-quality lens). DSLRs also offer the options of the interchangeable lens. They are quite good for night-time or lowlight photography. Quite many DSLRs come with Wi-Fi capability. This allows you to share the picture with your smartphone immediately after editing.
Your smartphone offers speed, comfort, and ease of usage. It allows you to be able to take pictures at moment’s notice. Your bulkier DSLRs produce higher quality images. Those can move onto your smartphone for further processing. They both provide you with everything you need to take a good picture for your Instagram account.
Plan ahead and choose a signature style and niche
First, you need to decide what sort of pictures you want on your feeds and your own particular style. Do you want your pictures in black and white? Do you want to take pictures of only food? Pick a style or type of picture and remain consistent and true to your style. A quick overview of your feed should show imprints of your style. Do not jumble of different styles and kinds of pictures.
Don’t use the Instagram application to take your pictures.
For regular Instagrammers, this one is a no-brainer. It is the first (and an incontrovertible) rule of taking quality Instagram pictures. Using the camera tool in the actual Instagram application limits your freedom. It robs you of the chance to take several pictures before deciding the best for onward posting on your feed. The Instagram camera also lacks some of the extra features. It doesn’t make photography and Instagramming fulfilling. You are also unable to use the grid feature available on smartphone cameras. users can’t even film in slow motion with the Instagram application. The Instagram camera leaves you shortchanged.
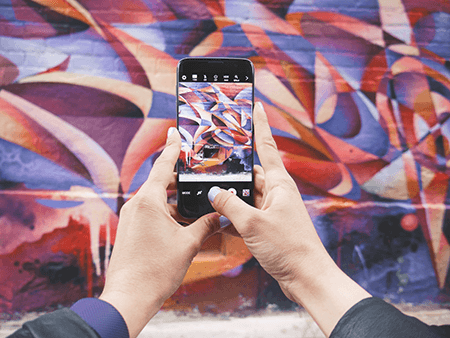
Other camera applications, such as Rookie, can also offer you unparalleled control over features. It allows you to change white balance and shutter speed to enable you take the perfect shot. Cortexcam is one of several camera applications. It allows you to simulate slow shutter speed to blur moving elements like water. How many times have you taken a picture only to discover that it’s blurred due to a jerky movement of your hand? Camera+ (for iPhones only) can provide you with a stabilizing effect. It helps to keep images clean and sharp and avoid the unwanted effects of shaky hands.
Using your native Smartphone camera or other camera allows you to set the level of exposure you want. You can underexpose your shot (we will discuss more of this technique). And take control of the way light will affect your image with camera apps like Camera+ too.
Take your pictures with your smartphone camera, other camera applications, or your DSLR. Edit them and then import onto your Instagram application. Then post on your Instagram account. On Facebook people take pictures and then import onto their account before uploading. Who goes about taking pictures and posting directly with their Instagram camera? only amateur Instagrammers do that.
Always keep the camera steady
Keeping the camera steady is a must to prevent blurred and grainy pictures. This is even more important in lowlight situations. Snapping moving objects like vehicles or animals at night needs total steadiness. Shutter speed is already low. Professional photographers use a tripod to achieve rock solid steadiness. A lot of your Instagram photos may be spur-of-the-moment shots. You need to learn to anchor yourself to something to keep your hands and the camera steady. Grab a pole, tree, fellow human being or lean and rest your elbows on a tabletop. Use a window sill, stool, park bench or any other structure around you. Create the greatest stillness and steadiness for the perfect shot.
Remember you are working in a square
Instagram will make you crop it into a square frame (like the old Polaroid cameras). Always keep this in mind whenever you are taking a picture for your Instagram. Pictures without this may look less spectacular after Instagram makes it square. So, always remember to leave extra space around the edges of your picture.
Native cameras on Apple phones have an automatic square frame for taking pictures. Open the native camera and swipe to the right. Some photographers think this can be limiting. They advocate the use of the crop tool after taking the picture to achieve the square frame. Hold your camera horizontally for as much space around the main target of your picture. Take the shot. You can then crop out the extra space around the image with your cropping tool. This gives you the freedom to choose what to crop out and what to leave within the square frame.
Understand the golden rule of photography
The rule of thirds (the golden rule of photography): If an image is broken down into nine equal scores by two equidistant vertical and horizontal lines running across it, placing the points of interest along the lines or at the intersections make the picture appear more balanced and allows the viewer to feel the energy running in the picture.

Smartphones come with a grid feature. The grid helps superimpose virtual horizontal and vertical lines on our screens. It leaves us with a very balanced image. The composition is everything. Using the rule of thirds allow us to take pictures that leave the primary subject at equilibrium.
To switch the gridlines on;
iPhone: Go to Settings, select “Photos & Camera” and switch “Grid” on.
Samsung Galaxy and most other androids: Launch the native camera, go to “Settings”, scroll down and switch the “grid lines” option to “on”.
The rule is a guideline that you can break if it is particularly limiting in a certain situation. Or when you feel your mastery of photography is much better.

Source: Digital Photography School
Natural light is almost always better
Most iPhones and cameras are great at taking pictures in a well-lit environment. Like as indoors away from artificial sources of light. Almost all come with a flash for when the lighting is poor. Nothing beats natural light when it comes to taking pictures. The secret is in knowing when to take pictures that will allow natural light to boost its glory.
Try taking pictures at dawn or dusk. You can get soft shadows and contrast to bring out the best in your picture. You can even manipulate shadows to create a concept shot (see picture below). Few people are fond of gray or overcast weather but it is the Instagrammer’s dream weather. Overcast and cloudy weather allows the light to spread out evenly. You have little worries about overexposure. Get your cameras out and whip up a ton of amazing pictures. Others may see cloudy weather but you have to see selfie weather. Lighting is the single biggest key to photography. No amount of editing expertise or applications can save a badly lit picture.
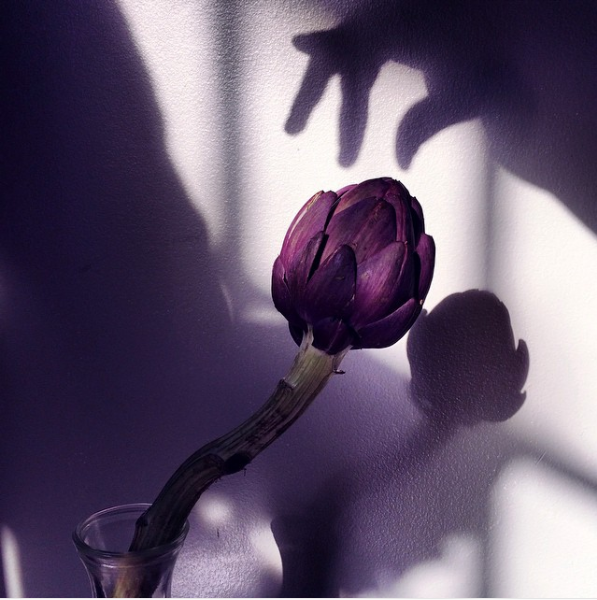
Source; Paul Octavious
Use your eyes at all times and be alert to find picture-worthy moments and events
For branches of photography, such as nature and street photography, you need to be alert for photo opportunities. It could be an unsuspecting human subject, massive waves at sea or an animal in a perfect pose. You need to always scan ahead with your eyes for opportunities. Most people take out their cameras and start taking picture right away. They’re not taking a moment to critically acclaim the shot. Most times, the result is a good picture that could have been great. If only a critical glance had been cast before the picture was taken.
Sparing a few moments to look through what is in front of you before using the lens is crucial. It can open up a new vista of creative ideas and point you towards the perfect composition.
Find different perspectives and angles
Many pictures taken with cameras and Smartphones come from a horizontal and straight plane. Or a bird eye’s view. Try adjusting the angles on your photos for great results. Unexpected angles can provide unexpected great photos. Climb a tree or go to an apartment window. Take downward shots from an angle or you can try taking a picture directly upwards. Unusual viewpoints can give a feeling of depth and height. They combine to produce a great photograph.
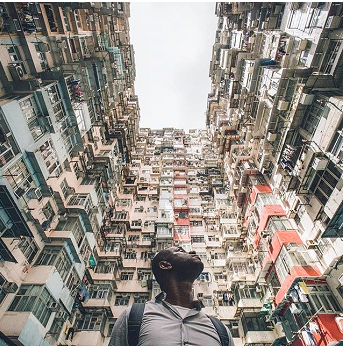
Source: Nicholas La / @Nikk_la
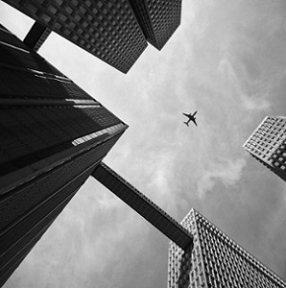
Source: iPhone Photography School
Use negative space to great effect
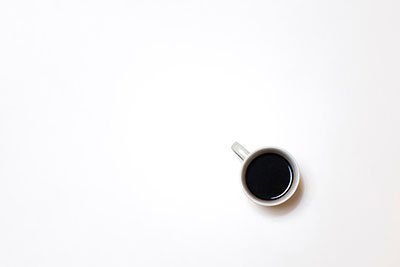
Negative space refers to everything in and around the subject of a picture. Using a lot of negative space around the subject allows the subject to stand out more. And in a less imposing manner. Mastering the use of negative space can propel you from an average or good photographer to a great one. Negative space can be the sky, a body of water such as the ocean, a large plain canvas or a large wall.
White space is a commonly used application of negative space to evoke a perception of a subject. In the words of one expert, Kyli Singh, white space allows the subject space to breathe. Next time you are about to grab a picture of your best friend, ask him to stand in front of a white wall or canvas.
Play with reflections
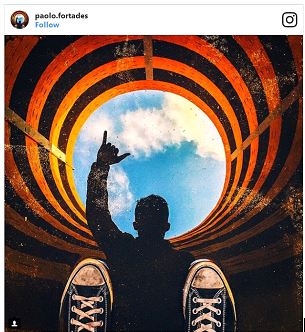
Playing around with reflections can help you produce pictures that defy conventional limits. Reflections from mirrors, rivers, and other shiny surfaces allow you to express creativity. It helps when trying to achieve the perfect shot. I love going out with my camera after the rain stops. I have produced innovative end products. The picture below was taken by Paolo Faredes after a rainfall.
Zooming-in is not always the answer
Sometimes the subject of our picture is farther than we like. Whether it is a view on the other side of a bridge or a landscape of a waterfall and its surroundings. The default answer most people apply is to zoom in before grabbing the picture. But this may not be your best option. Cameras and Smartphones now have great zooming abilities. But zooming-in will always leave the final picture looking more grainy and pixelated. If it is actually possible for you to move closer, if you need to cross the bridge to get your perfect shot, please, do so. Getting closer to the subject of a picture breeds intimacy. It gives more energy flowing through the photograph.
It is much more advisable than zooming in. There may be some special cases. If the the subject is an animal, it may be scared away or riled by close proximity. In these cases though, you can take the picture without zooming in and then crop out the desired area. It achieves the zoom effect without compromising on quality. So, no matter how far away your shot is, always make zooming-in your last option.
Focusing
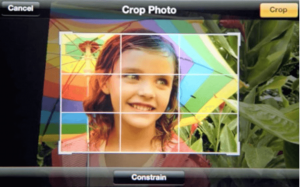
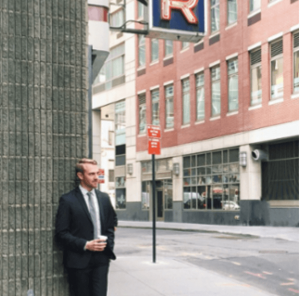
Having a single subject to focus upon in a picture gives greater odds of a very good photograph. By tapping on the screen of your smartphone once, you can set the focus to a specific part of the picture. Not everybody remembers this little hack. It can dramatically increase the clarity of your subject. iOS users also have the extra feature of being able to lock the focus and exposure to a preset level. This gives the lighting they desire. Tap and hold your fingers on the screen until the words AE/EF Lock appear on the bottom. Than you can exercise total control over your lighting and exposure.
Source: Patrick Janelle
The underexposure technique
It’s annoying and frustrating to have a brilliant picture ruined by overexposure. It is smarter to take underexposed pictures. We can then brighten using a variety of editing tools this way. Underexposure is a particularly effective technique in bright lit environments. For example, in strong sunshine. iPhone users and most Android users can use the AE/EF lock technique to select the level of exposure. Simply tap and hold fingers on the screen
Use editing apps
Instagram itself contains many editing options. This includes filters. But using other editing apps is a great aid for producing great pictures. These apps beat the Instagram application hands down any day. You can find many editing applications that offer options and features to enhance your raw pictures.
Facetune allows you to touch up your face. You can take out or smooth weird colors and shadows with Lumiense and Snapseed. Snapseed can also help brighten selected spots in your picture. With Vsco-cam (available on iOS and Android), you can take pictures and then add a wide range of filters. We have talked about the stabilizer and light editing features of Camera+. But you can also use it to add focus or flash to your image. For $2.99, its features are available to you on iOS. Cortexcam is great for low-light situations. You can also try Perfect365. It’s the application the Kardashians use daily in taking the selfies. TouchRetouch offers the ability to remove whole items from your picture. Such as the unknowing photo-bomber. Foodie is an application that offers filters for food photography enthusiasts. Use these applications to give a lift to your pictures
Less can be more
An over-edited image can appear unrealistic and lose its allure. Taking a picture far from its original state has counterproductive results. You can little tweaks here and there. Filters are the soul of Instagram. An intense filter can overpower your picture. Sometimes we have a particular filter in mind to use for a picture. But after taking the shot, we discover that the color and textures already seem perfect. Don’t be afraid. If it seems right, don’t add filters. After all, the #nofilter hashtag is a popular tag on Instagram. Filter intensity level of 3-6 is generally considered okay.
Practice and Always take many shots
It is a very effective saying that practice makes perfect. Practice taking the perfect shot in different light. And from different angles and perspectives. To take the sort of high quality photo, you need extensive practice.
Taking many shots of the same subject allows you to choose the best one(s) that suit your purpose. Vary the composition and take different frames for the same subjects. Try from varying heights, distance and angle. You can also play around with exposure and shutter settings. The bottom line is to take as many images of your subject as possible and then select the best. As a rule, try taking at least five shots of your subject if it is not mobile and two if it is on the move. After taking five to eight shots, you can already start to see which two or three of the pictures are looking best. Take these and edit to get the picture you wanted.
You should also make use of the burst feature available on Smartphones. The burst mode uses a very fast shutter speed setting to take multiple shots of the same subject. And you can then select the best ones. It allows you to record a moment in sharp detail. It is useful in only well lit environments or daylight. The burst mode is a particular favorite for recording people in motions. This might be good for jumping or skiing.
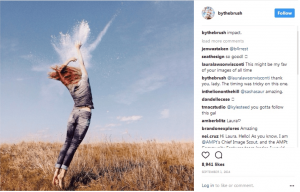
Always remember to always focus on quality over quantity. This is true if you suffuse your Instagram account with a too many of both low and high quality images. The low quality photos will strangle the beauty of the better ones. Curate your feeds. And post only pictures of the highest quality to keep your followers yearning for more.
Ready to follow these tips? You are ready to take the kind of pictures you have always admired on Instagram. It will help increase the numbers of your followers exponentially.


