Last updated on December 6th, 2023
It is a fact that people enjoy photos taken at night. The ability to capture beautiful images of stars and the moon is a skill that many people lack.

Taking pictures in the dark can be challenging, particularly for the beginners. You will have to manipulate the aperture, ISO, and the shutter speed. There may be more to adjust. But, after learning the basics, you will realize that night photography can be quite fun. You should never be afraid of experimenting and each time you try you will be proud of the outcome.
What equipment you should bring for the night photography
For successful night photography, you will need the right equipment. Besides the camera and lenses, here are some of the other items you need.
A sturdy tripod
To succeed in night photography, you will have to buy a quality tripod. Photography taken in dim conditions demands longer exposure. This means that you should keep your camera steady I prefer one made of aluminum or carbon fiber. They are durable and light.
Multi-Mode Headlamp
To be safe, you will have to include a headlamp in your safety gear. Try multi-mode headlamp such as the Black Diamond Storm. It provides around 250 lumens from its main LEDs. And it offers dimmable green and red night vision modes. It will also add colorful light painting effects to the extended exposure. Most of the headlamps are waterproof and suitable for any condition.
Flashlight for the light painting
Light painting techniques will add illumination to every landscape element. This is crucial during longer exposures and you can use them to highlight the key objects. Colorful lights allow room for more creativity. The Gerber Recon LED flashlight offers four modes for various purposes. It has green for checking the maps and red for the night vision preservation. It also has white for general usage and blue for liquids identification. Moreover, you can use the lighting to add color in the light painting.
Intensifier filters
Most photography experts will tell you to shoot without filters. That is good advice because filters will cut the light reaching the sensor. That’s a situation that might need a longer exposure. But, if you are photographing in a highly polluted area, you will need a Filter. Filters will boost oranges and reds of autumn colors. They block similar wavelengths to those associated with city lights pollution.
Extra batteries
Longer exposure means that the sensor of your camera will work overtime. And that will drain the batteries faster. Keeping an extra battery or even two is important in night photography. Also, you should avoid third-party bargains. Go for the batteries the camera manufacturer offers. The manufacturer will always take care to produce higher quality batteries. If something went wrong with the third-party battery, your camera could get damaged.
What settings for night photography
The biggest difference between night and daytime photography is exposure values you need. Darkness changes everything. After getting the right equipment, you will need the right settings. Here is what to do.
Try the manual focus
The autofocus available in most modern cameras is more reliable but it is not foolproof. The weakness is evident when capturing photographs at night. The cameras struggle more to adjust due to the darkness. With the manual focus, the camera will not focus on the scenes you are photographing. Remember to turn the manual focus on the infinity.
Stick to the ISO when possible
Start by understanding the ISO levels of your camera. To do that, use various ISO settings to take several low light shots for testing. Examine every photo you capture. Check the ISO level producing the noisiest photos. If the camera is unusable at ISO 1600, you will have to stick to the low settings.
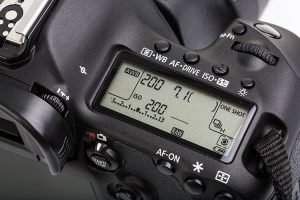
Most of the cameras can shoot photos at around ISO 25,000 but that does not mean that you should use such high levels. Because you will be using a tripod, keeping the ISO low is the best thing to do. Use slow shutter speeds and wide apertures to avoid bumping up the camera’s ISO. ISO 100 is impractical for night photography. But ISO 800, 400 and ISO 1600 will be adequate in most situations.
Set the aperture to the lowest point possible
How the aperture goes will depend on the lens. In fact, some lenses will go lower than others do. A lens can go down to f/3.5, f/2.8 or f/5.6. If you are not comfortable with changing the aperture, you can try some of the video tutorials on YouTube. Some photographers temp to shoot at very high apertures such as f/11 or f/16. If you choose that route, you will have to make a compromise so that you can gather more light.
Set the shutter speed to 10 seconds (10)
You can adjust the shutter speed down or up depending on the amount of light available in the landscape. But, 10 seconds will provide you with a good starting point in night photography. Capturing images at 10 seconds seems crazy, but you will come to learn that it is not strange.
The exposure
By learning how exposure works, you will be able to capture great images and control the camera in a better way. You will have to combine the shutter speed, ISO and Aperture to come up with the exposure. The elements have effects on exposure. They cause alterations in the motion blur, depth of field, and the digital noise. After you have understood how each of them works, you can try the manual mode and control the camera in a better way. Use the exposure triangle to remember the three settings.
Picking a subject for your night photography
Now it’s time to select the best subjects for your night photography. The subjects are not very different from what you would capture during the daytime. Here are a few ideas.
Buildings
The great looking buildings are a perfect night-time subject. The concept is among the obvious, but if well executed, you will enjoy the results. You can also use it as your starting point.
Fountains
Only a few photographers will choose fountains as their night-time photography subject. Most photographers are not aware of what fountains can provide. At night, you will find them lit in different colors which add interest. Long shutter speed will make the fountain to appear flowing at the night.

Astrophotography
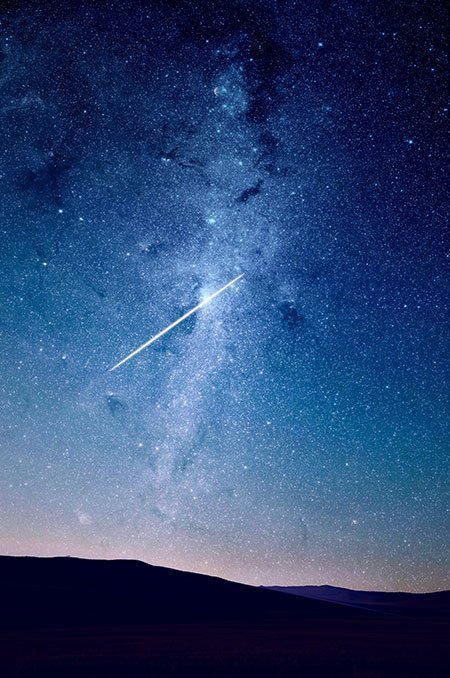
When out of town, you will only need to get out at night to capture great photos. Clear moonless nights are a better choice. You even can try to capture the Milky Way.
Bridges
Almost every town or city has a bridge. To use a bridge a nighttime subject, it doesn’t have to be the Golden Gate Bridge. If there is a bridge that is usually lit at night within your area, you can choose it as your subject. By using long time exposure, you will make the water to blur and the traffic to look light streaking lights.
Car trails
Light trails from moving vehicles are fun to include in your photography work. They appear when a vehicle moves through the frame when you have your camera’s shutter open. Your camera will pick the light but because the vehicle will be gone. The result will be a picture showing streaks of lights. Time the picture so that the vehicle will move across the frame while the shutter is still open.
Reflections
A benefit of long shutter speeds used at night? Reflections appear better on water surfaces. That is true on lakes and ponds and puddles. Try to take the reflection photos after rain.
Tips to editing
You can edit your night photos to have the best appearance. Considering the many types of photos you will get, giving specific editing advice is hard. Still here are a few things to consider.
Highlights
Considering the nature of night photographs, you will deal with many dark areas. And bright ones, too. The highlights will be blown out. And when blown out a little, they will be bright thus necessitating some toning. Some of the RAW editors available on the internet will provide you with good results when in this stage. When using Photoshop, you need to identify the Highlights slider and pull it towards the left. That way, you will decrease the highlights.
Shadows and blacks
When in the editing part, you will have to brighten some sections and make the darkest spots pure. You do not have to preserve the details in dark skies. To achieve that, pull down the Blacks slider. You will maintain contrast after pushing down Blacks.
Sharpening
Sharpen your night photographs as you would sharpen the day ones. If the photos are noisy, you will need to do some noise reduction. Both the ACR and Lightroom provide Noise Reduction section. To access sections, pull the Luminance slider rightwards from the Detail panel. Noise manifests in the darkest sections. That is why you should not sharpen every part.
Conclusion
Night photography is interesting and will provide you with many unusual pictures. It is also a good time to go out shooting because other people will be asleep and you will have no work to do. Yet, remember to buy a tripod, a camera remote, a flashlight, a lens hood, and extra batteries.


