Last updated on December 5th, 2023
Lightroom presets are an important tool to have in a photographer’s arsenol. Presets make photo editing pretty much done for you, but not every one fits every picture.

That’s why it is important to have many at your disposal. If you have never installed a Lightroom preset before, you will be all set after this.
Here’s how to install presets like a pro:
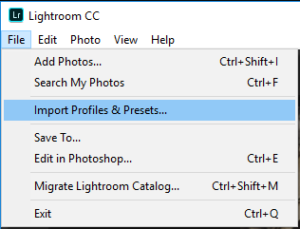
1. From the menu bar, choose File > Import Profiles & Presets.

2. In the Import dialog that appears, browse to the required path and select profiles or presets that you want to import.
3. Click Import.
How to Install Presets in Older Versions of Lightroom
- Open Lightroom
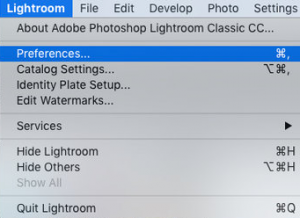
- If you’re using a Mac, locate the top menu bar and navigate to Lightroom > Preferences. In Windows, you will navigate to Edit > Preferences.

- When the Preferences box appears, select the Presets tab.
- Click on the button labeled “Show Lightroom Presets Folder…”

- A new Finder window (Mac) or Explorer window (Windows) will appear. Open the Lightroom folder, then open the Develop Presets folder.
- Copy and paste presets into this folder.
- Restart Lightroom. You will find your new presets located in the Develop Module under the Presets section, along the left side of the screen.


